Building a wine cellar monitoring system - Part 1 : The hardware and setup
In this series of posts, we'll see how to build a wine cellar monitoring system sending data to the #cloud with some #iot, #timeseries and #microservices on a #raspberrypi. Is that enough buzzwords yet?


Hi there!
As you may know already, I'm French. And as most French people, I care about my wine :). We moved to the Netherlands with 80 bottles in the trunk and I'm getting about the same amount delivered every year. I store all those bottles in my attic, where the temperature is the most stable. But how stable exactly?! That's what we'll figure out in this series of post !

In this series of posts, we'll see how to build a cellar monitoring system sending data to the #cloud with some #iot, #timeseries and #microservices on a #raspberrypi. Is that enough buzzwords yet?
More seriously though, my original goal is to be able to check the variations of temperature and hygrometry in my wine cellar over the course of a year, from my phone. Let's see where that brings us :).
If you don't want to read, you can find the complete project (still WIP) on GitHub.
This is how I (roughly) plan to describe the project :
- Ep1 : Setup and Communicating with the sensor - This article
- Ep 2 : Creating a java library to interact with the system
- Ep3 : Service implementation with cloud sync - WIP
- Ep4 : Detecting sync issues and missing data - TODO
- Ep5 : Dashboard and results visualization - TODO
The hardware!
Before looking at dashboard and the cloud, we want to be able to actually get the values we need. That's what we'll look at in this post.
A few requirements :
- It has to be cheap
- I wanna use as much #java as possible.
- It should also be robust and quite reliable
That's it!
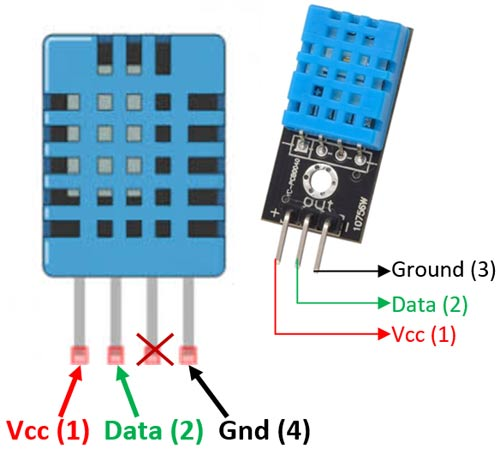
To check temperature and humidity, we'll have to get some electronic component to do the work for us. Looking at my requirements, the cheapest and most common component in use would be the DHT11 (or DHT21 if you want more precise values).
The characteristics seem perfect for us :
- 3 pins, works with 3.5V
- 0 to 50 degrees temperature range and 20 to 90% humidity
- +/-1 % and degree accuracy
It looks like this :
What pleases me the most about those characteristics is that they fit perfectly with the I/O pins of the Raspberry pi, which means we can basically solder the component on the pi and we're good to go!
Here is a quick look at the pi model 2 I/O pins :
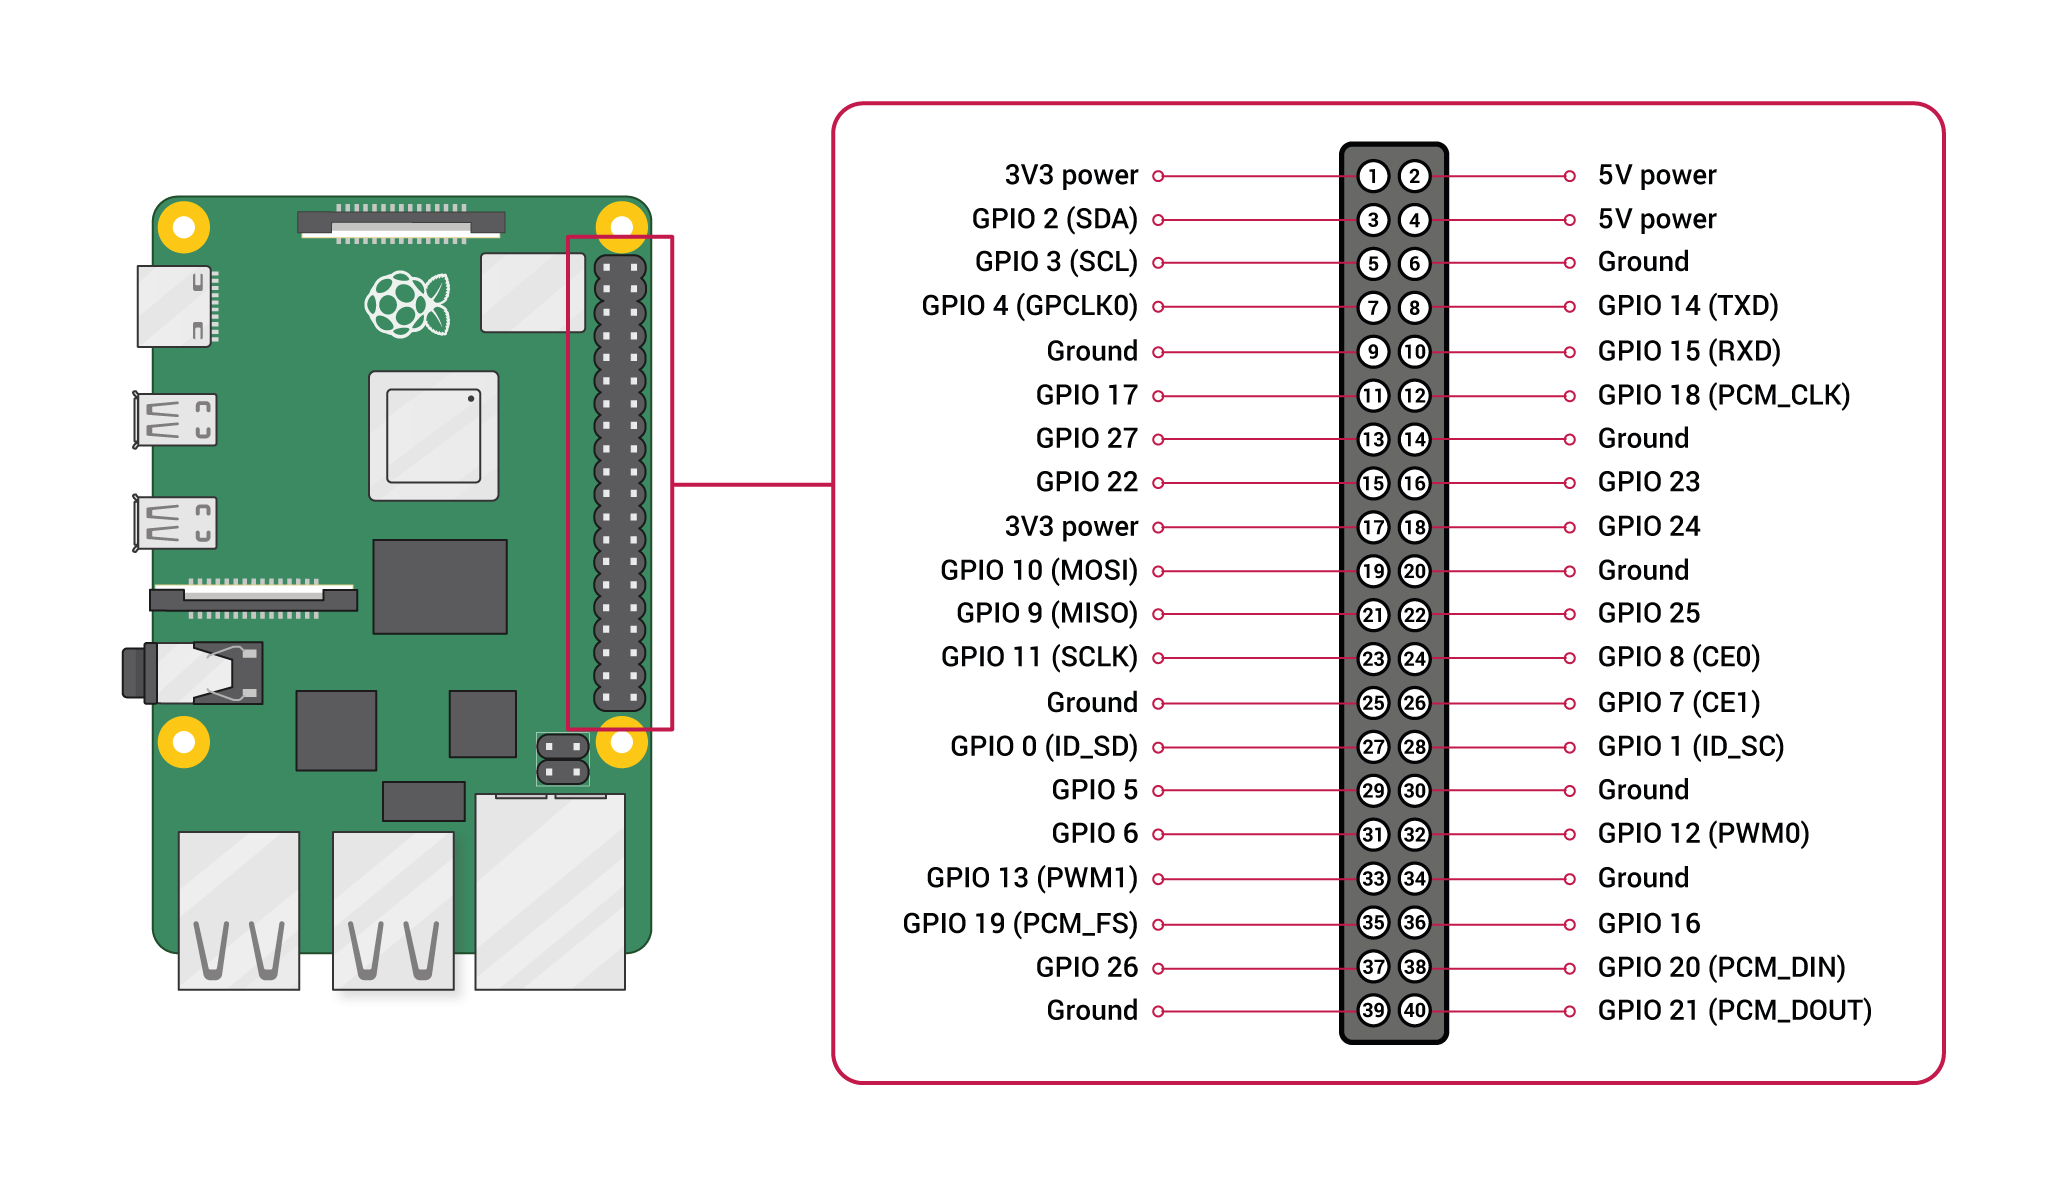
All we need here is one of the 5V power pins, one of the ground pins, and one of the GPIO (you may choose the one you like :)).
The complete build looks something like this :
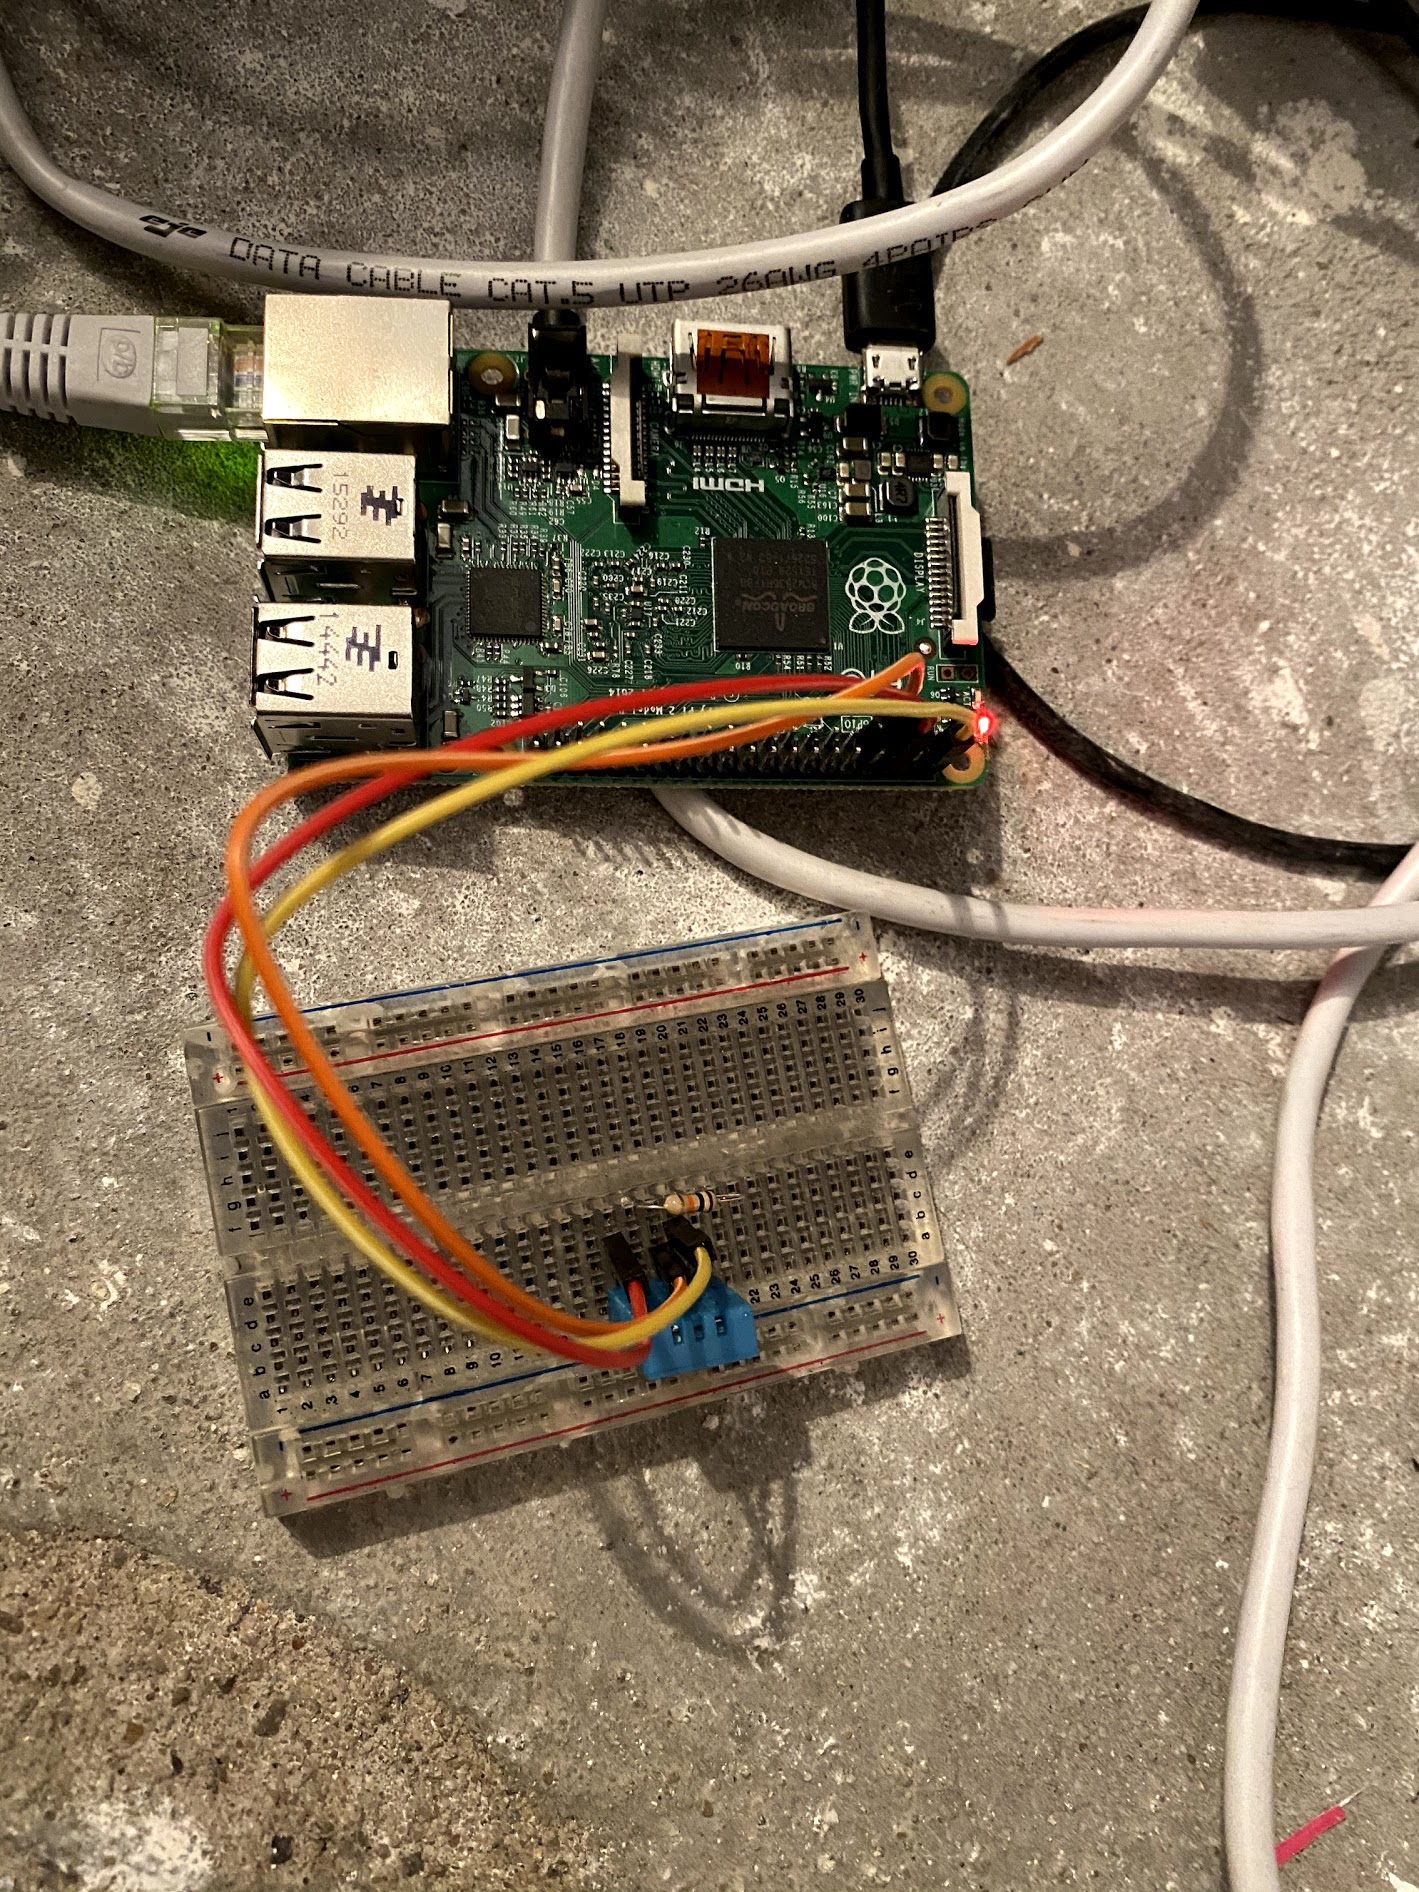
Alright, nice! Now we want to be able to read data from the sensor!
Setting up Sync between the Pi and my dev machine
Because it is my Pi that has the GPIO, I have to run my code there. I have several options available to me for development:
- Using my Pi as dev machine. The simplest setup. However, the pi is not very powerful and running a full IDEA on it will be cumbersome. Because I want realistic from day 1 as well, I placed my pi in the attic, which is not the best place to write code :).
- Using my usual dev machine and transferring the data to the Pi. Another solution would be to code locally as I do every day, and then transfer the generated artifacts on the pi using SCP or anything equivalent. That's nice as we will save a lot of compilation time. However it requires a lot of manual labor. We will also see later that compiling native code for the Pi architecture should be done on the Raspberry.
- Use some IntelliJ magic and combine both options! We'll use a nice feature of IntelliJ called automated deployment, which will allow us to keep a two-way synced workspace between our two machines! This way we can write Java on our laptop, compile it there if needed and run on the Pi easily. Here is how it looks:
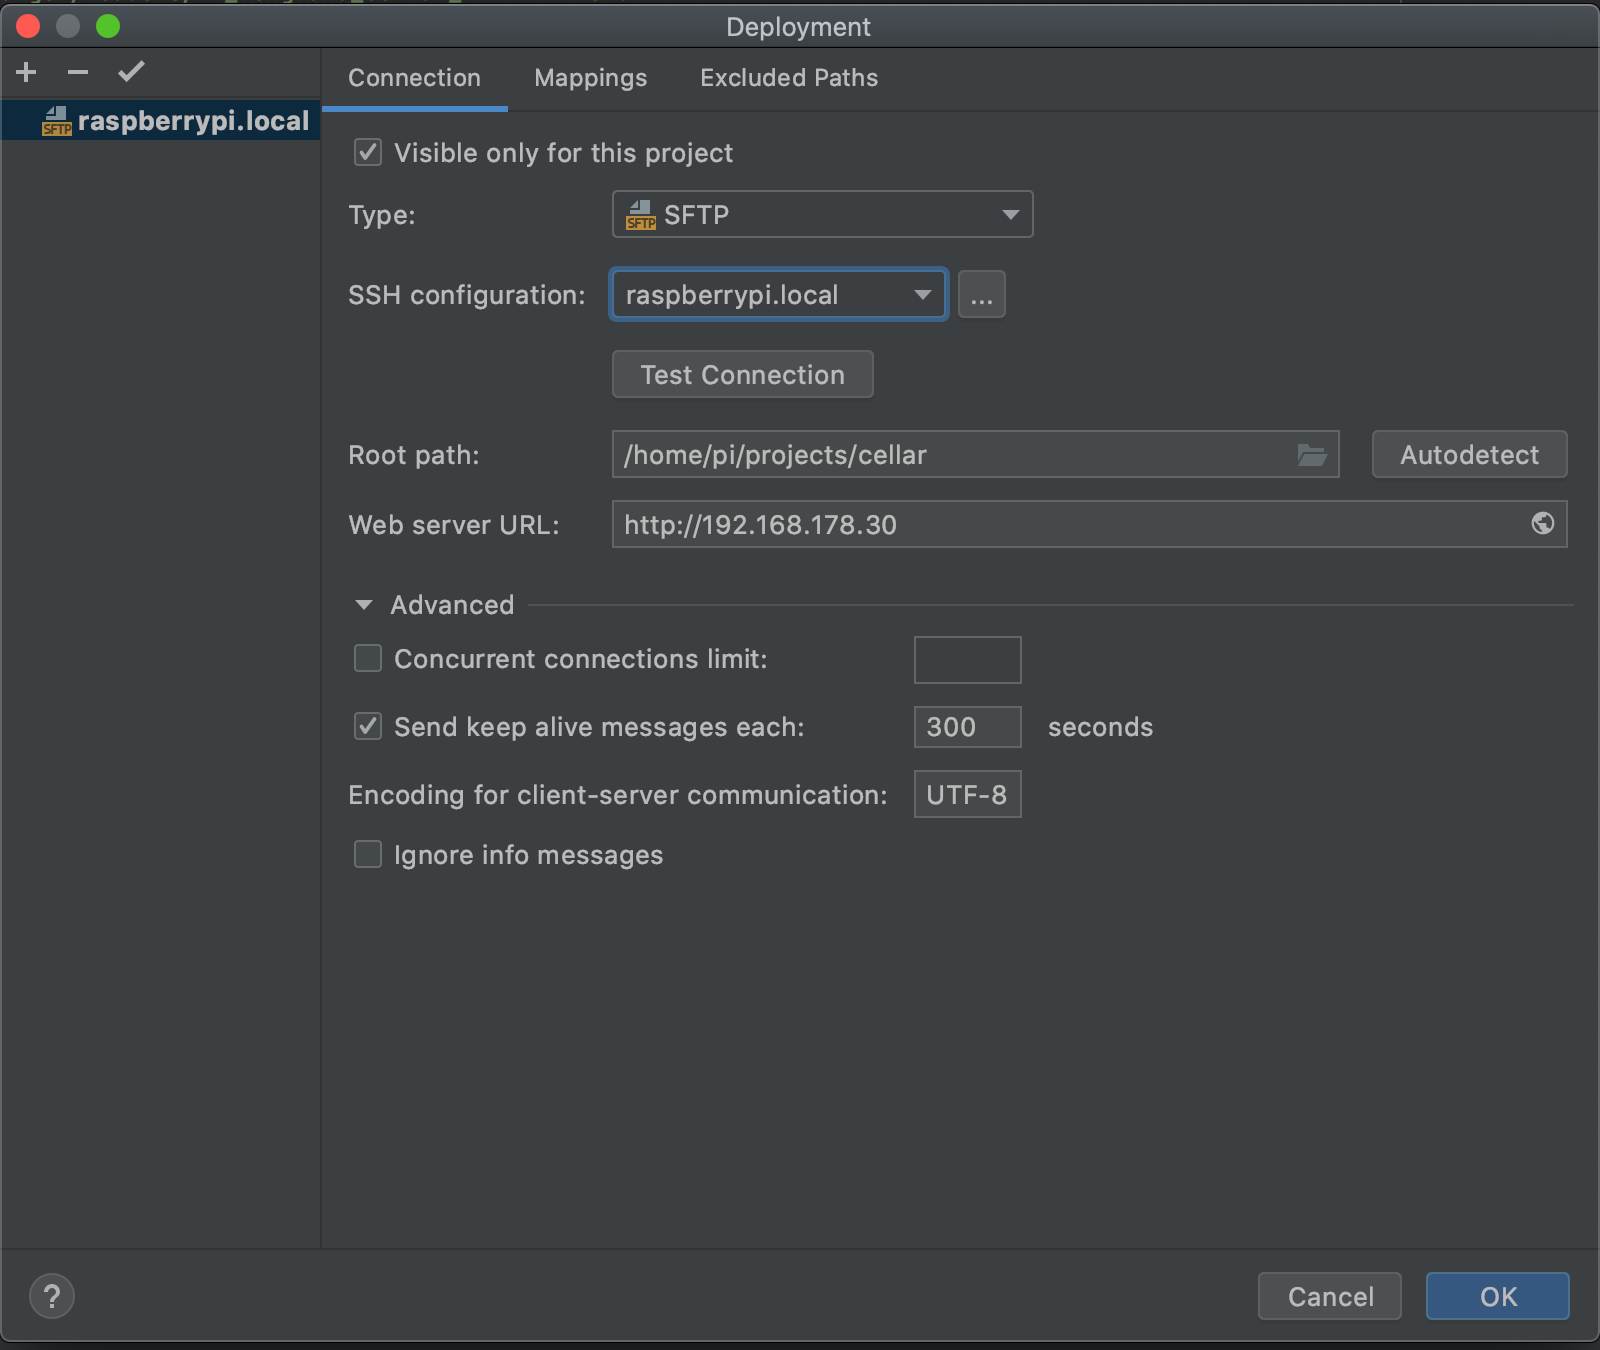
In Tools -> Deployment -> Choose 'Configuration'
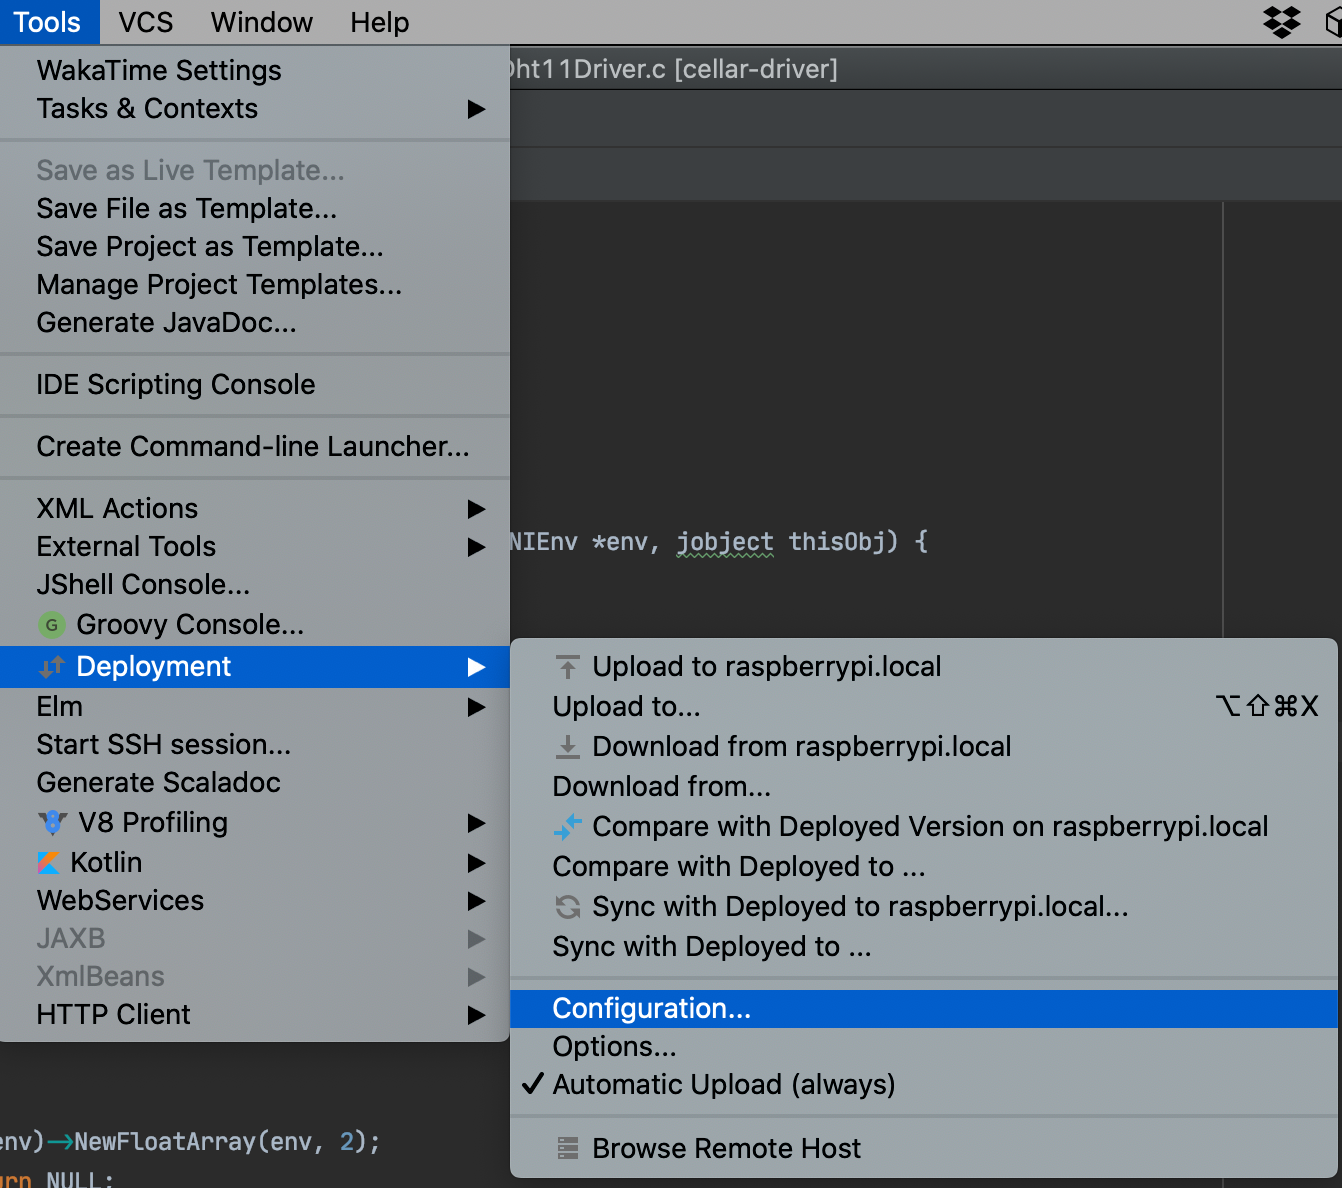
Create a new configuration to access your Raspberry. The easiest in my case was a SFTP connection. You'll be asked to create a SSH configuration the first time, as well as to choose a folder where to upload all of your code.
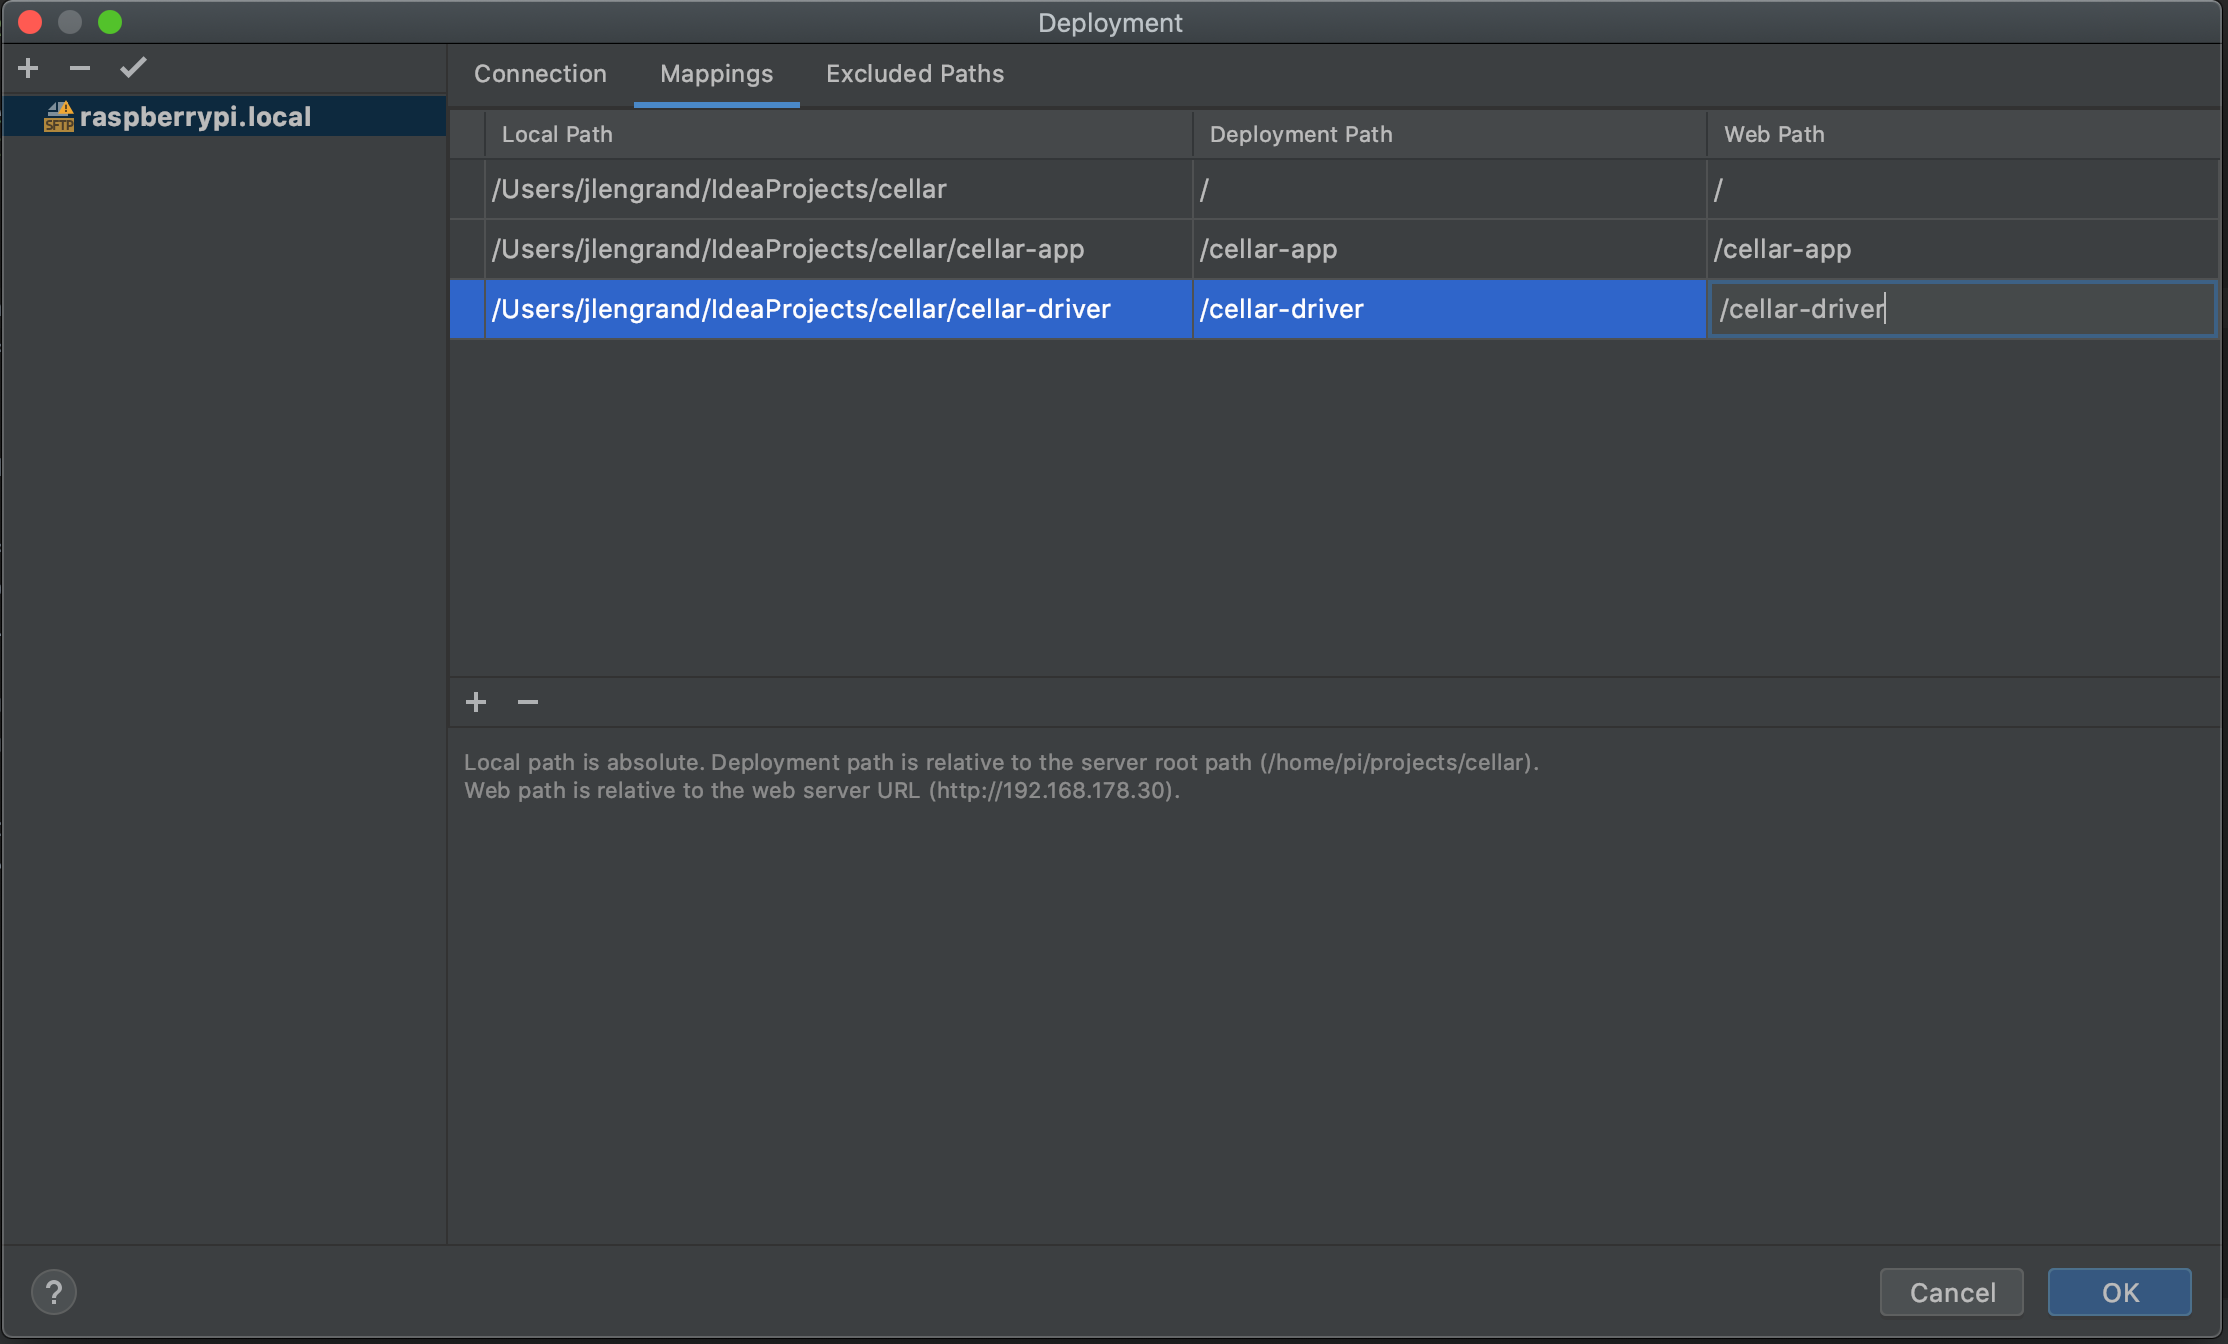
Don't forget to have a look at your mappings, which lists the relations between local and remote folders. In my case, I created one for my root project and one per maven module that I have in my project. At this point though, the root mapping should be enough for you if you just want to play around.
Finally, if needed add some excluded paths. I honestly didn't bother given the small size of the project but it might be more useful for larger projects, or if you want to compile for multiple architectures for example.
Once you have done all this, you will basically have a 1 to 1 relation with your raspberry pi in real-time. You can use the Tools -> Deployment option to sync as needed, or even automate two-way sync like I did. You can even browse the local host to see what its current status is.
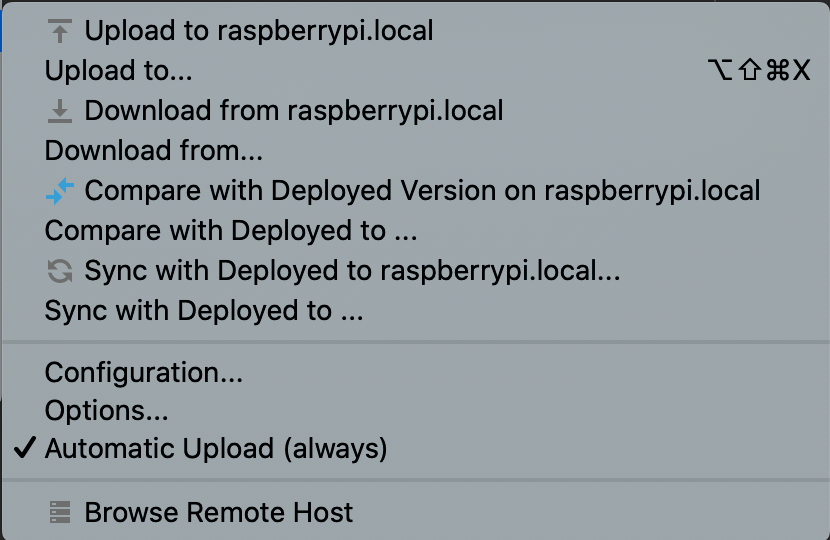
Don't forget to have a look in the options to choose something you are comfortable with. For example, do you want file and folder deletions to be synced as well or not.
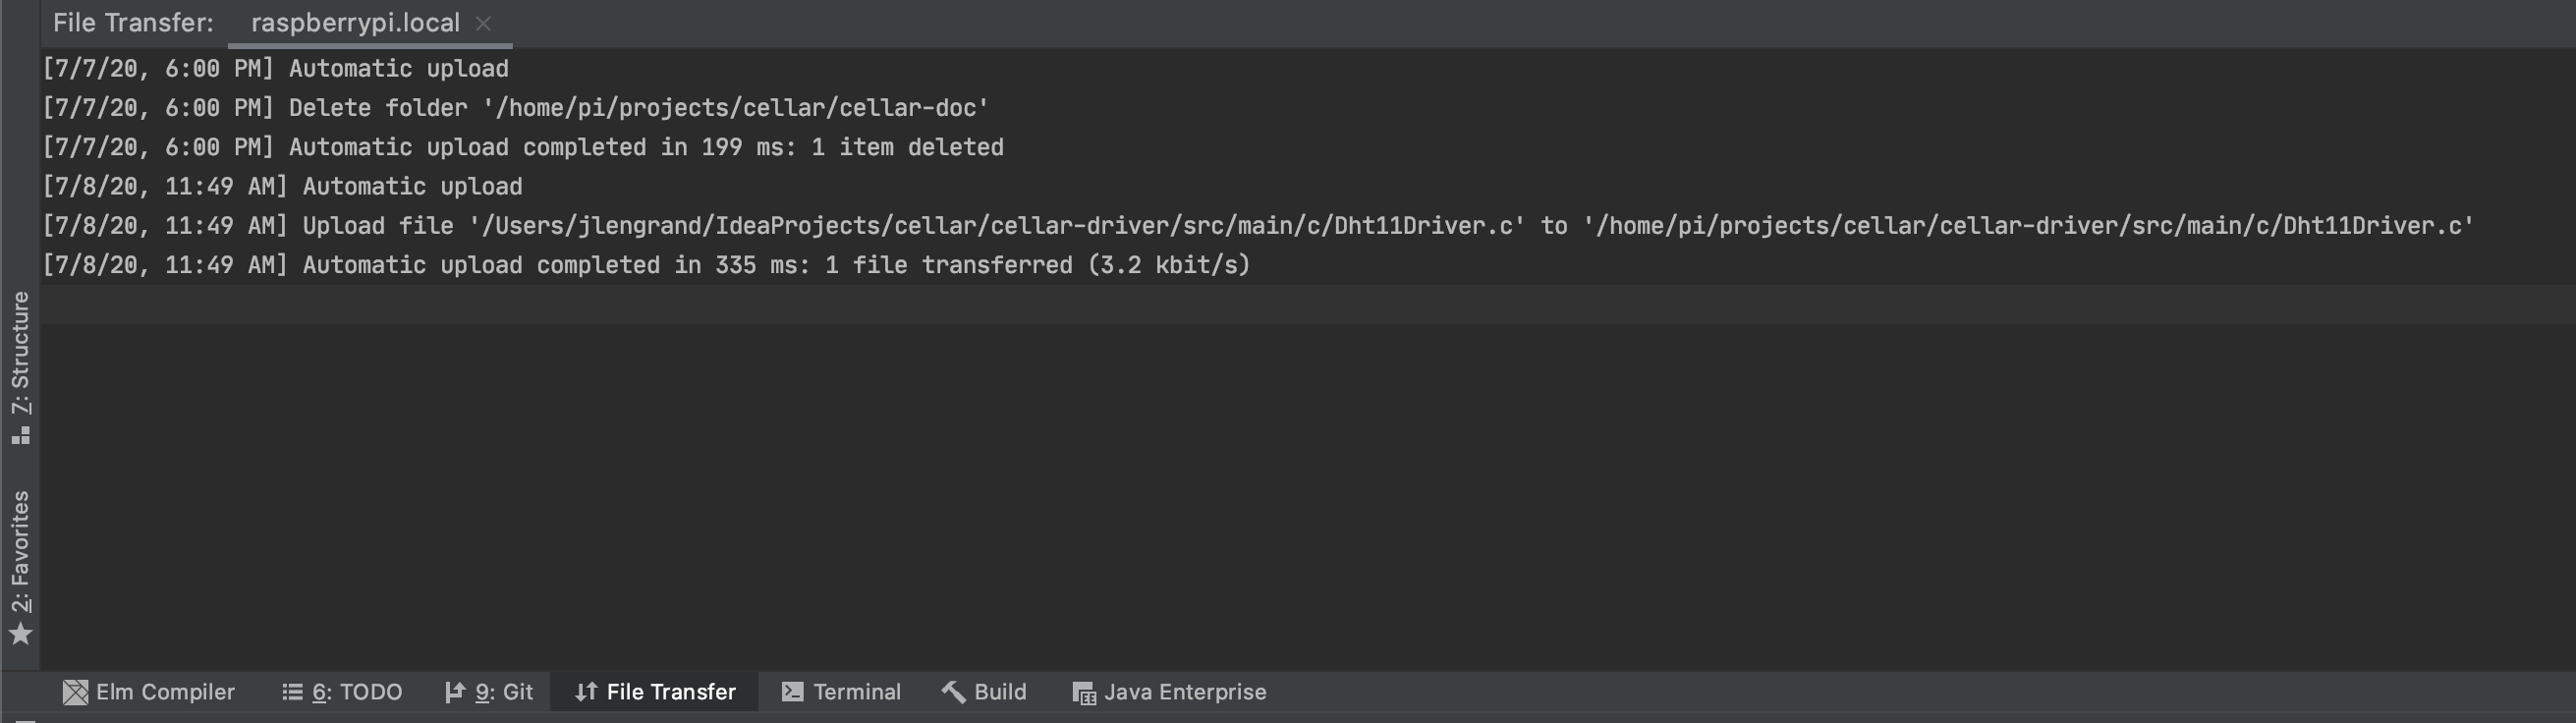
Once all of this is done, you will have access to the informative 'File transfer' view of IntelliJ which will give you a real-time overview of the syncs happening between the machines in real-time.
Alright, everything is setup and we're ready to get some Temperature and Humidity from our sensor!!! Let's go
Pure Java implementation
As a #java guy, my first hunch was to want a full java setup. Pi4J seemed like the perfect tool for the job! A library to interact with the Pi GPIOs from Java. Pi4J relies on the underlying WiringPi library, which has to be installed first.
I've setup a first simple test script using Pi4J and heavily inspired from this stack overflow answer.
Now there are a couple things I really didn't like about that method:
- It needed several iterations before being able to read a proper value form the sensor. Usually this means several seconds, and reducing those timings lead to errors
- I had to play around with the
GPIO.delayMicroseconds()values to get results, which made me doubt the code would be reliable in the long run. - The code as written now contained some magic which did not make me comfortable.
I decided to look for lower level alternatives, and search for existing libraries.
Leverage existing libraries and going native
That's it, the decision was made to write some C code, and glue it with my Java at a later stage using the JNI. It also felt appealing simply because I had not touched the JNI for years and could use a quick refresher.
I would basically create a small .dll (or .so file in that case) that does all the heavy lifting for me.
The only thing about using that method is that my C code has to be compiled for the Raspberry Pi architecture (and in my case most likely on the raspberry itself). That's ok though, I'd only have to do that once.
As I mentioned, the good thing about using this method is that we can rely on the shoulders of giants! I got lucky enough to find this repository from Adafruit providing a driver for the DHT11 and some Python test code as well. Let's make use of it!
We'll copy all of the code that we need to read the DHT11. I use a Raspberry2B, so I'll allow myself to cut some corners.
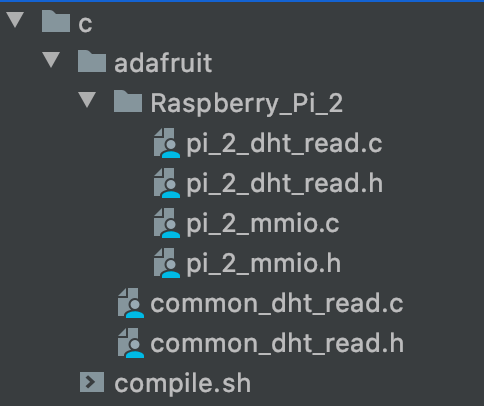
The function we want to use in the end is int pi_2_dht_read(int type, int pin, float* humidity, float* temperature) in the pi_2_dht_read.c file. We see that this file needs:
- Its own header file
pi_2_dht_read.h - The generic code to read from the pi2 GPIOs
pi_2_mmio.candpi_2_mmio.h - The files that contain utility functions
common_dht_read.candcommon_dht_read.h
We'll keep those files from the library (in a folder called adafruit) and add a very simple test file to test it. Here is the content of my testAdafruit.c code :
And this is how our project currently looks like :
Almost there! We will need to compile that code to test it. We can do this in a single line of code (which I put in a script for convenience).
$ gcc -Wall -I. -Iadafruit/Raspberry_Pi_2 adafruit/common_dht_read.c adafruit/Raspberry_Pi_2/pi_2_mmio.c adafruit/Raspberry_Pi_2/pi_2_dht_read.c testAdafruit.c -o testAdafruit
This line of code creates an executable file called testAdafruit. When we fire it, the following happens :

We did it! We can use our sensor and we're getting values from it, quick enough to create an API like interface for it.
We're just at the beginning and our journey, and haven't done any Java just yet. However we have found out how to achieve our original goal of environment monitoring. We created a simple C program that can read temperature data from our raspberry pi remotely. We also cooked up a nice development setup with the help of IntelliJ deployment's feature. In the next article, we'll look into how to produce a library from our C code and create a basic API that we can use to get data from the sensor.
Stay tuned!